Lion Rampant Game: 'A Snake in the Grass' scenario from 'Wargamers, Soldiers & Strategy' Magazine.
Returning to one of my favourite games this Sunday at Darwin Tabletop Gamers, Lion Rampant (LR), a game that we've really enjoyed over the past 18 months or so, and today was no different. In fact it was a rip snorter of a game I played with my mate, S_.
S_, being new to LR, took it all in his stride, and we were up and running quickly. S_ is one of those blokes that always plays in the spirit of gentlemanly, good-natured fun. Neither a rules lawyer or hyper competitive, he doesn't take it all too seriously, so he was the perfect opponent to whittle away a few hours on Monsoonal Darwin afternoon...
What else would you want to do on a rare, cool rainy day in the tropics?
I had recently purchased the latest Wargamers, Soldiers & Strategy (WSS) Magazine, and thought that the scenario - 'A Snake in the Grass' could easily port over from dark ages to a later period that would suit my collection of 100 Years War English and French.
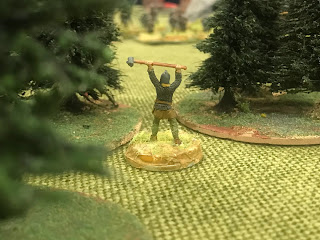
Our version - an English Spy is on the run through the woods and fields of the French countryside and is hiding amongst the ruins, cottages and woods. Each red counter on the table represented a possible hiding space. The goal for each side was to capture the Spy, and bring him back to their own entry point on the table, and thus win the game.
We didn't focus on 'Glory' or 'Boasts' for this game, catching the Spy was the aim.
And so it began...

Poor old S_ had a few dramas rousing his English from their slumber, as they failed their initial activation. A large part of my French retinue would need no encouragement to enter from their edge and move into the village to begin their search for the Spy.

S_ had eventually moved his English Mounted Bowmen (Yeomen) first, using their long range of 12", and he began pushing them forward to some of the more obvious hiding/meeting places for their Spy.
Time was of the essence, as the French were already scouting about.

Soon S_ began moving the rest of his retinue forward. They had lost a bit of time during the first turn as many of his units did not activate.

My Mounted Sergeants soon arrived at the first 'hiding spot' in village, hoping for an easy find and a quick retreat. All I had to do was roll a 6 on a d6, and he'd be found. My French would have an easy exit and an almost too easy win if I found him on my first search attempt.
My Fierce Foot would move to guard the left flank of the village, while my Foot Sergeants would move up the guts to protect any pursuing English.

It was a stroke of good fortune for the French.
We house-ruled that each mounted unit had to roll to 'dismount' (activate to move, and spend a turn) before they could search. This rule prevented the gamey situation in which mounted units could simply ride around and vacuum clean the hiding spots. It also added a little tension to the game because it gave the other player a chance to move and search on their own side.

The the midst of the search, my Skirmish/Bidowers had approached another empty hiding spot. This time, after rolling 2d6...nothing unusual occurred. The WSS magazine has a few doozy's in the random events table...bees...wild animals... injuries etc. etc. So I guess I should have been thankful because some of those events are not good for the search crew.

The English had also made a fruitless search of the old castle ruins, but did also 'hear' & 'notice' the shouts or movements of the Spy, and were also given a free move to the next hiding spot, as dictated by the random events table.
Surely the Spy would be found soon, but Where? When? Who would get there first?

It was the French that were to first find the Spy, but luckily for the English, he managed to evade capture and ran further into the woods (as per the chart in the magazine, but we used a D8 instead...as it has a directional point).
By this stage, the English Mounted Bowmen had been caught by surprise by some French Fierce Foot. Their numbers had been whittled away in a brief encounter.

Nevertheless, the English Heavy Mounted Knights and Foot Sergeants were soon moving into position.

My French Mounted Sergeants pursued the fleeing Spy into the woods, but were met by the English Foot Knights that had arrived just in a nick of time.
A heavy clash of arms ensued, leaving the French a bit bloodied and bruised. Perhaps they weren't quite prepared for English Knights to fight so fiercely.

The French had to retreat back through the woods to gather their composure,
but thankfully by this stage of the game, my Fierce Foot troops had moved quickly into position in their own pursuit of the English Mounted Bowmen. They had clashed with them early and had caused a few casualties and had forced them to evade.

The French also had a sneaky and small unit of Skirmishers moving on the flank. They didn't amount to much more than a minor nuisance to be perfectly honest, and were soon sent packing by the English bowmen guarding the rear (we house-ruled also that the English Bowmen could shoot long range over the heads of their own troops...more Hollywood than historical probably...but it seemed acceptable, and didn't really unbalance things dramatically).


The English had their own plans to out flank.
Their Mounted Knights had rode over the hill and now threatened to crash into the completely unaware French Fierce Foot that had recklessly 'Wild Charged' and chased the English Mounted Bowmen on the previous turn. I had a good stroke of fortune and had managed to roll passes on their Courage before it was too late...

These French Fierce Foot had decided to go out in vainglorious fight to the death, heroically counter charging the English riders. Reckless and brave, but what else could you do? At least it would give the F.Foot a chance to take a few English Knights down before they in turn would be cut down.
Those Mounted English Knights would smash into the French Fierce foot, 'Battering' them and threatening to wipe them out completely on the next turn. Unfortunately for those English Knights, it was also a bloody clash that cost them a few lives.
Thankfully for the English, their leader had survived that brief but bloody clash.

I seized the opportunity at this stage to call out a Duel, as I was getting a little desperate, and I thought that if I could kill their leader, it would give the English pause for thought, cause a few failed Courage checks, and that would slow them down.
A Duel or a Challenge is hands-down, the coolest thing about Lion Rampant. Once per game, a 'challenge' can be issued, and the leaders - if both are in range of each other - stop the battle, meet, and fight.
Now if I won the duel, it would give me time to perhaps rally my own Battered troops, and even move up my sluggish Mounted Knights and Crossbowmen. Those two units of mine had just sat up the back of the table edge doing diddly-squat for turn after turn.

The only problem with my plan, was that S_ had rolled a 9 when attributing Leader skills at the beginning of the game, giving him the 'Braveheart' quality, and this meant that I could only hit him on 6 when I rolled my 3D6s.
The Duel itself was inconclusive. Neither he, nor I, could land the knockout blow it would seem. Each Leader would return to their men.

Soon after this brief interlude, the English Foot Knights began to move their Spy to their own entry point, and their Heavy Knight would make one more attack to harass my Fierce Foot. Those French Fierce Foot were soon to be killed off, with the few survivors fleeing for their lives.
My Mounted Sergeants by this stage of the game had gathered their resolve, turned back in an attempt to once again charge the English with their Spy, but the Sergeants had expended the last of their strength and were beaten back. They fled the field.
The English moved their line of Foot Sergeants into position, to cover the retiring Foot Knights with their Spy. These Foot Sergeants would have to hold the line, as the French still had a unit of Foot Sergeants, Crossbowmen, and a sluggish squadron of Mounted Knights...where oh where were those bloody Knights when you needed them?


The French Crossbowmen arrived on the flank and seized an opportunity to get stuck in. They fired away at the remaining English Mounted Knights, killed their Brave-Hearted leader, and wiped the rest of the unit out.
It was the first of few devastating salvos.
The few English Mounted Bowmen failed their Courage test after witnessing the death of their leader, and fled the field. All of the remaining English units passed their Courage tests however. The fight continued.
The English nerve held...for the moment.

The French Foot Sergeants, with their Leader, made some quite bloody but inconclusive attacks on the English 'Red Line' of Foot Sergeants. The French Leader rallied his last remaining loyal Sergeants for a big push...but they were soon to be slaughtered to a man.
The bloodlust had taken hold of the French by this stage, as their remaining units had also passed their Courage tests. The tussle over a single man was turning into quite a bitter and contested fight.

Although the French Foot Sergeanst & their leader had died to a man, they had managed to batter the English 'Red Line'...and that line simply couldn't hold against a charge from the Heavy Mounted French Knights.

Many of the English Foot Sergeants were to be killed in the assault. They quickly broke and fled the field.
It was at this stage when S_ failed to activate twice, leaving me with the initiative.
Things were on a knife edge at this moment in the fight. The French Mounted Knights were only a bound or two away from catching up with the English and their Spy.
Could I wipe aside those Archers, and just maybe catch the Spy in a final fight to the death?

My French Crossbowmen earned their keep on the left flank. They had slid around the castle ruins to deal with those pesky English Archers. Now that they were in range, the Crossbowmen sent a brutally effective volley that sliced and diced up the Archers before they could respond.
Perhaps the rout had set in with the loss of the English Foot Sergeants, because the remaining Archers fled the field as well.

The English Knights, along with their Spy, were oh so close to their exit point by the time those Archers were routed.

My Mounted Knights and Crossbowmen had devastated the English ranks late in the day, but it was to be too little, too late.

S_ managed to just activate his last remaining unit, giving them a bound to the final 'victory' for the English.
According to the scenario rules in WSS, neither side can claim victory if they lost more than 50% of their forces...but I'd like to think that whatever intel that Spy had, it was definitely worth fighting over...and that the lone English Spy returned to his King & Field Commanders crucial information that would change the course of the campaign...


Comments