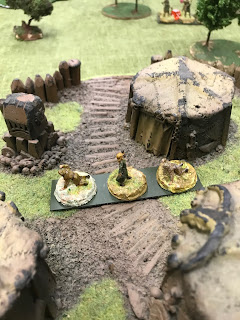
Today was first chance to properly give Lion Rampant a red hot go.
I'd played a few sample turns with my son over the past few weeks, but the moon and stars aligned this Sunday, and I was able to line up a face to face game with a mate of mine. We met at the Darwin Tabletop Gamers group, and used some of their ace terrain...such as the village I used for the scenario. I didn't quite follow the 'loose' formations as recommended in the book (which I now have a hard copy of...thankyou Tactics WA..good service), instead I opted to used my magnet bases to cut down on the fiddlyness (we were under a bit of time constraint here).
The scenario was basically a meeting engagement/defend the village game. The Arthurian Knights (my Airfix Sheriff of Nottingham) were tasked to rescue the cowering Monks that had been kidnapped by the 'Heathen Hordes' (Orion Vikings). The Heathen had to prevent this, and try to use their wooded terrain to their advantage.
Here is the initial set up. The village lay at the eastern edge of the table...my Heathen had a 24 point retinue made up of * 2 skirmisher units * 2 fierce foot units *2 Foot Men-at Arms (veteran/brutal fighters).
My opponent, MR, had a more interesting array of units at his command. *1 Mounted Men at Arms unit* 2 Foot Serjeants units *2 Foot Yeoman and *1 Archer unit.
I used dice to track damage on some units, as I don't have enough figures to really popular the table for all the larger units.
MR began the first turn by moving his Mounted Knights through the centre.
Followed by his Foot Yeoman unit.
My Skirmishers and Fierce Foot moved over into position to meet them. I hoped to duck & weave a little using those skirmishers, and they were quite a nuisance throughout the game (I had pretty good activation rolls with these two units for some reason, they were always prepared to use their special 'Skirmish' rule).
As MR's Yeoman moved through the centre, my Skirmishers (Biddowers) ducked in and out of their wooded cover to hurl spears and did manage to inflict a few casualties. My Fierce Foot moved up to try to control the space, but MR's Archers by this stage had moved on to the hill, and began to retaliate with some pretty effective ranged attacks. All the while, MR slowly moved his Foot Serjeants up through the southern flank. In hindsight, I should have been more aggressive with this unit in particular. I should have moved them to meet the threat on the southern flank, and perhaps even, overrun the archers. But yeah, I didn't.
In centre of MR's thrust, things really started to become aggressive, and there became quite a tussle between the Mounted Knights and my 2nd Fierce Foot unit and, my Veterans (Foot Men-at Arms). Even my skirmishers got in a few cheeky - but ineffective - licks along the way.
My Fierce Foot couldn't sustain the damage inflicted by the Arthur's Foot Serjeants and Mounted Knights, they did however manage to kill off their 'vulnerable' Sir Percival... a small consolation before they eventually were routed from the field.
Eventually my Veterans arrived to try to plug the gap and blunt MR's 'Up the Guts' attack.
My desperate defence almost held out. My Vets, bled my mate's Foot Men Serjeants *and* his Mounted Knights in a battle of attrition that lasted a few turns. My mate's Knights eventually fled the field for another day.
By this stage I thought I had managed to turn my fortunes around by routing a few of Arthur's lesser units.
Still, my losses could barely sustain the defence, as Arthur's archers and Foot serjeants had routed my lightly armoured skirmishers on the southern flank, leaving the gate wide open for the rescue. By this stage we called the game to a close.
The monks were to be rescued. Yay. No more cowering in the mud at the heels of brutal shield maidens.
It was a pretty fun game, the system is great, very easy to pick up and roll along. My mate picked it up pretty easily too, as with all of my work mates, he is not a gamer-type.
The point system balance the game well, having said that, I would like to play a game with similar 'missile units', as these tend to very effective. Similarly, if I had a deployed my Fierce foot a little more aggressively I could have counted the effect of the Archer's harassing fire.
All in all. Tops.


Comments